As of August 2019, the Zazzle text box handles have been improved. Are you a Zazzle designer, who sells designs that have custom template fields that a customer can personalize? If so, it is CRUCIAL that you know how to use the new changes to the Zazzle text box handles to avoid cart abandonment. In this article and video tutorial, I will provide you with everything you need to know to ensure your text template product designs are done properly to avoid lost sales.
Zazzle Text Box Handles Create Better Text Templates
Zazzle is known as the print-on-demand company (POD) that offers customers personalized items of both photos and text. As of August 2019, Zazzle has improved the text box function to help avoid issues of text running into other design elements on the product design. However, as a result, we as Zazzle designers must now add another step into our design process to ensure that the customer can easily add the text they want in the specified areas on our designs.
What Product Types Does This Text Box Change Apply To?
This Zazzle text box handle feature applies to every product that has a custom text field where the customer can add text. That includes monogram initials, names, text on business cards and invitations, and much more.
Do You Have To Fix Old Product Templates?
No. Any products posted with template fields before August 2019, will still behave in the old way. If you posted the product in August 2019, you may want to check your template fields and recreate the template areas if the Zazzle text box handles have been set and are too restrictive.
What Exactly Are The Changes?
Here are the descriptions from Zazzle:
- Top and Bottom Handles: There are no longer handles at the bottom or the top of the text boxes. You need to use the corner handles to resize the text box. As you resize, the text will resize also to fill the text box.
- Side Handles: You can now make the text box as wide as you like with no impact on the size of the text in the text box.
- Text Wrapping in Templates: For designs made with the new text handles, when a customer enters text into a template object it will wrap to a new line once the text has hit the limit of the width of the text box that you set during the design process.
Zazzle Text Box Handles Tutorial
Was this video helpful? This is only one of many detailed training videos that you will have access to in my new course. Access will be open on September 12, 2019.
Set Horizontal Text Area with The Side Handles and Why?
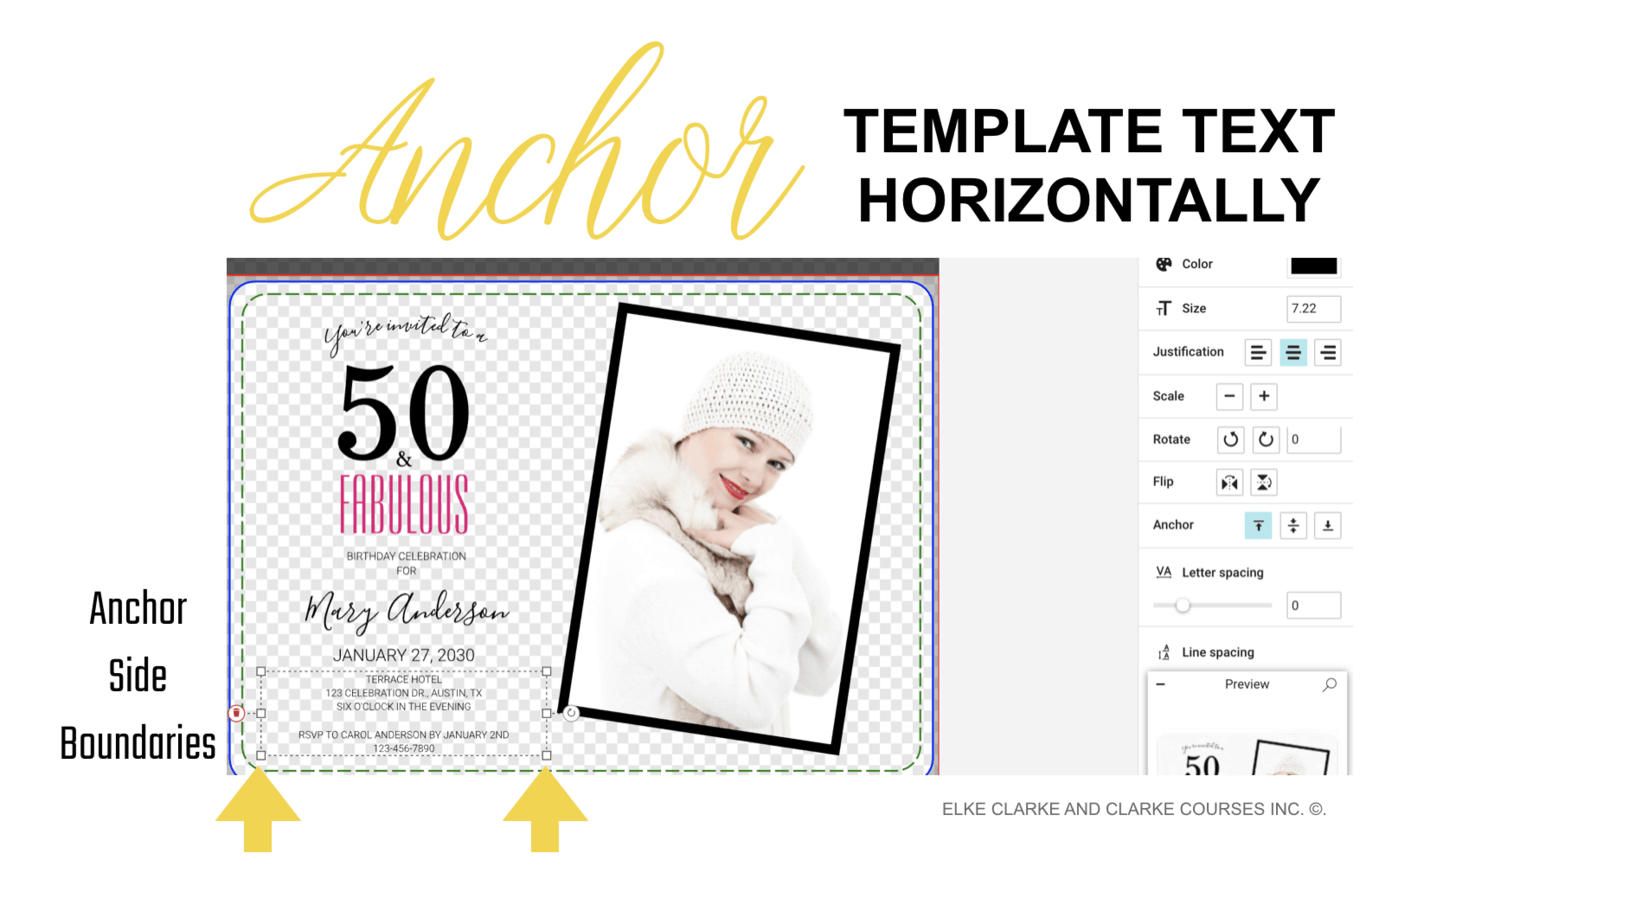
In the past, if the customer replaced your sample text on a product design with their text, the field would keep expanding horizontally. Now when you add in your sample text, the text defines the outer boundaries of the text box. What if the customer’s text is even one character more? Then the boundary set would force the. text to text-wrap to the next line.
The problem is that the customer would not want that text wrap to happen on certain designs.
You can lose the sale if this happens because the customer does not know how to fix it. Everything looks exactly the same as before the change. There is no note on the Zazzle design area that says “If you need more room on the line, select CUSTOMIZE IT FURTHER”.
You, as the designer, have to be proactive and set the text area by expanding the horizontal area for the text BEFORE you publish the product for sale.
See the image (below) and also watch the tutorial (link above) on how to set your text boundaries beyond where the text goes.
Set The Vertical Text Area with the Anchor Option and Why?
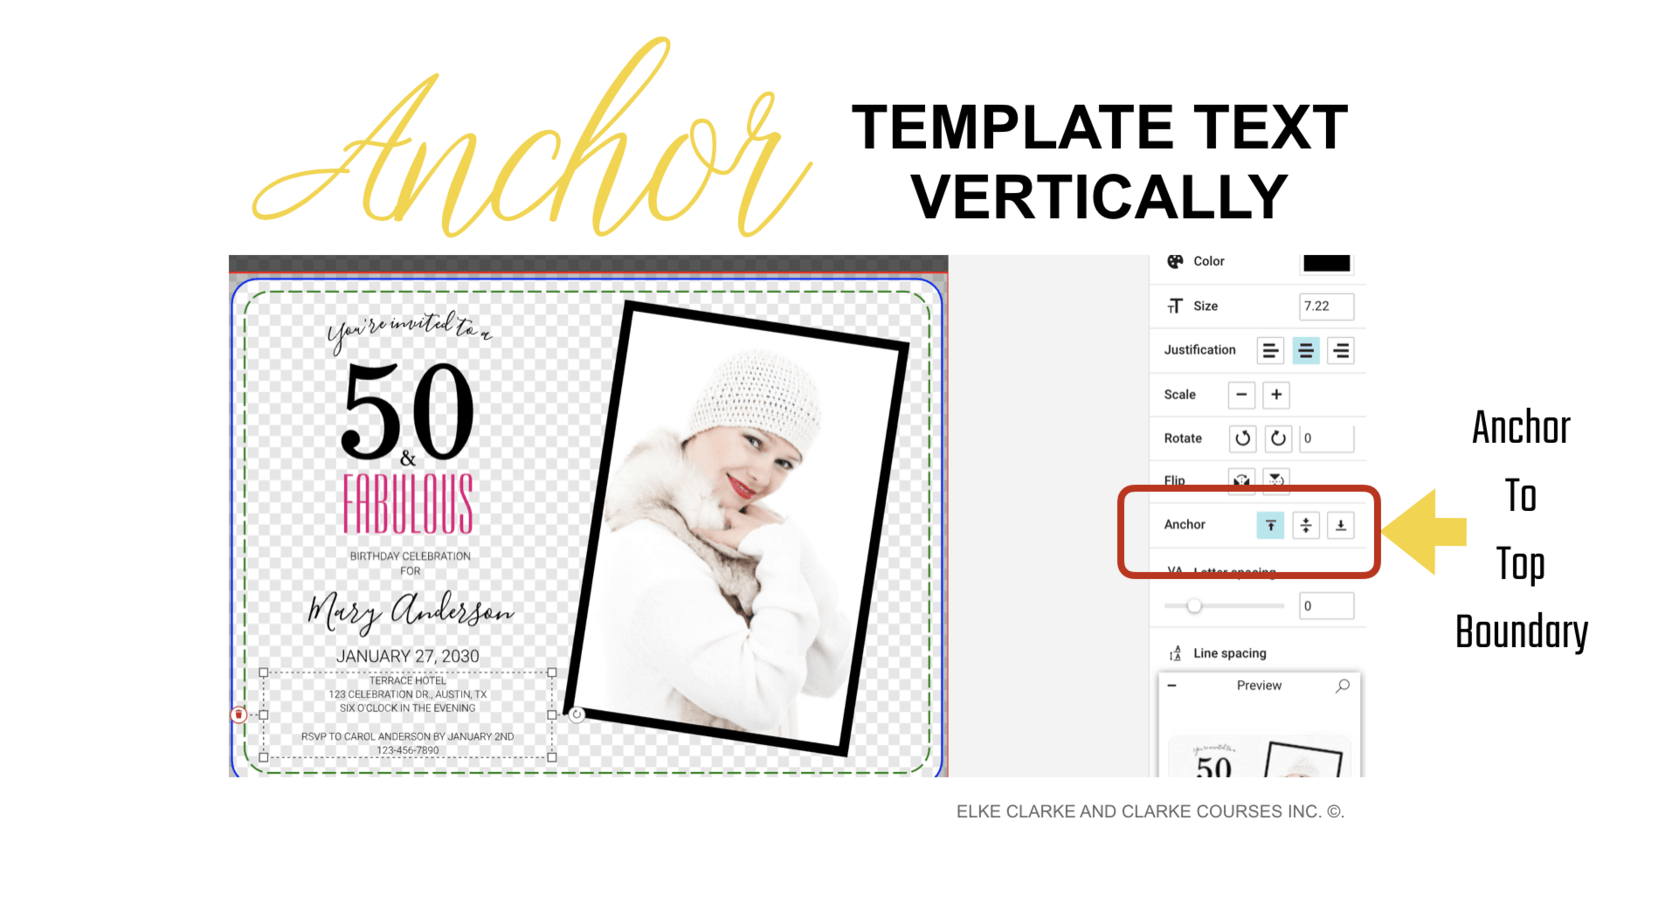
This new feature is on the right sidebar of the Zazzle Design Tool. You can choose to anchor the text box, to the top, or center. or the bottom of the text box. If you don’t want text to expand vertically into the area above it, you can select the “Top” anchor option. Get the text evenly expanded above and below from the center as the text is added by choosing the “center” anchor option. If you don’t want text to expand vertically into the area below it, you can select the “Bottom” anchor option.
See the image below for where the anchor option is located on the Zazzle Design Tool and how it can be applied to this invitation example.
Set the anchor for each text template.
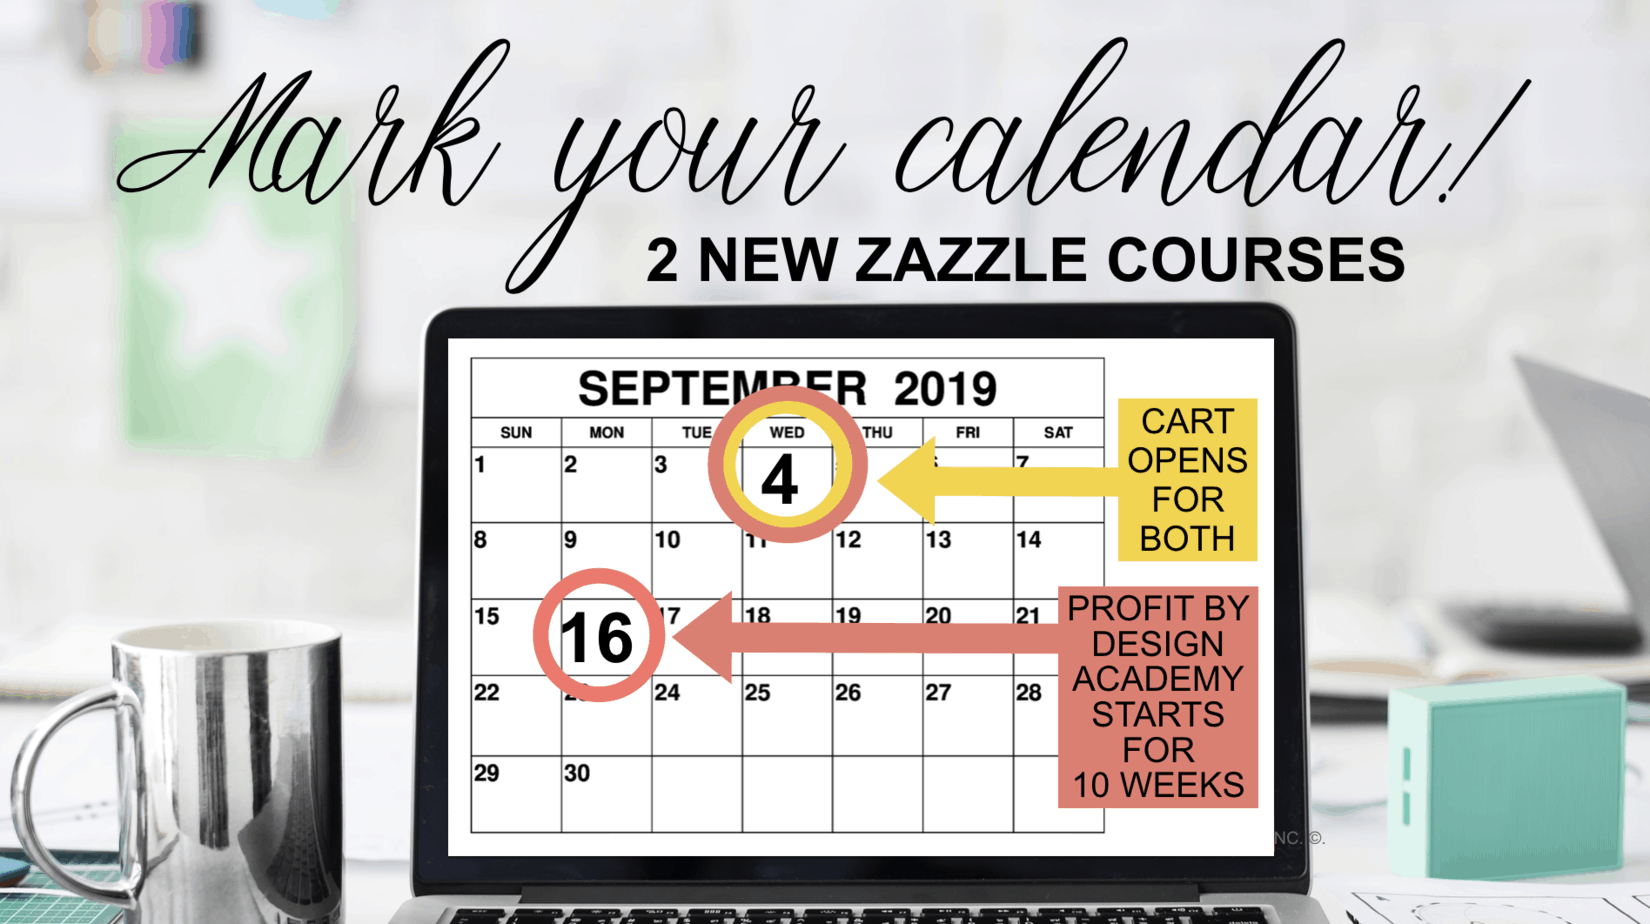
Mark Your Calendar for These Important Dates
Wednesday, September 4, 2019, at noon EST
LIVE Q&A with Jen and Elke
We will answer questions like:
- Which of the 2 New Zazzle Courses is best for you?
- What is the difference between the 2 new courses?
- How are these different than the previous courses and programs?
- Why are we holding a 10-week academy?
- and more.
CLICK HERE TO SECURE YOUR SPOT at NOON EST on SEPTEMBER 4, 2019:
Wednesday, September 4, 2019
The cart will open for both courses:
- The E-Commerce Accelerator™
- The Profit By Design Academy™
Monday, September 16, 2019
The 10-week Profit By Design Academy™ will begin.
Jen and I can’t wait to see you in the first-ever, 10-week, Profit By Design Academy™ training session.
I love Comments – Post them below
What was your biggest takeaway from this article?
Connect With Elke and Jen
Easily connect with Elke and Jen in the way that works best for you.
Click here to connect with Jen or go to www.JenClarke360.com.
Click here to connect with Elke or go to www.ElkeClarke360.com
OR open the camera on your phone and hover the camera over the QR code below to be taken to the link.

Use this QR Code option to connect socially with Jennifer Clarke or go to www.JenClarke360.com
Use this QR Code option to connect socially with Elke Clarke or go to https://www.ElkeClarke360.com
About the author:
Elke Clarke, is the award-winning author of the book Create Online and Grow Rich. Elke mentors and teaches digital creatives online marketing and business strategies to build a profitable eCommerce business. The 5 Step Profit Plan VIP Mentoring Program™ is Elke Clarke’s signature program that hundreds of people around the world are using to make money online by being successful designers and sellers on Zazzle. Connect with Elke, on social media by clicking here or visit https://www.ElkeClarke360.com

