There are common design mistakes to avoid if you want more sales on Zazzle. More sales on Zazzle means you are making more money online as an entrepreneur. Do you want to earn more passive income using your creativity? Heck Yes!!. It was always my dream, to make money (lots of it, like 2 comma club amounts, oh YES!). That’s what happened for me, Elke Clarke, and my daughter, Jen Clarke after we implemented our signature 5 Strategies: Establish, Create, Promote, Align, and Analyze™. The strategy I want to focus on in this article is “Create”. If you don’t post products with great designs that the customer wants, you won’t sell them. But your designs might be great and they still don’t sell. Why is that? It’s because of some common mistakes which you can avoid. In this article, I go over the 3 common design mistakes and how you can fix them.
How to Get More Sales on Zazzle
If you have a great text design, photograph, or artwork it’s time to add it to a Zazzle product. You might think that this is all that you need to do. Sometimes it is. But there are many times that Zazzle designers make these 3 common mistakes:
- Incorrect bounding boxes for sample text
- No template field for customizable text
- Use of low-quality, incorrectly sized image file
Let’s dive into these in more detail.
Not setting the text bounding boxes properly = Common Design Mistake #1
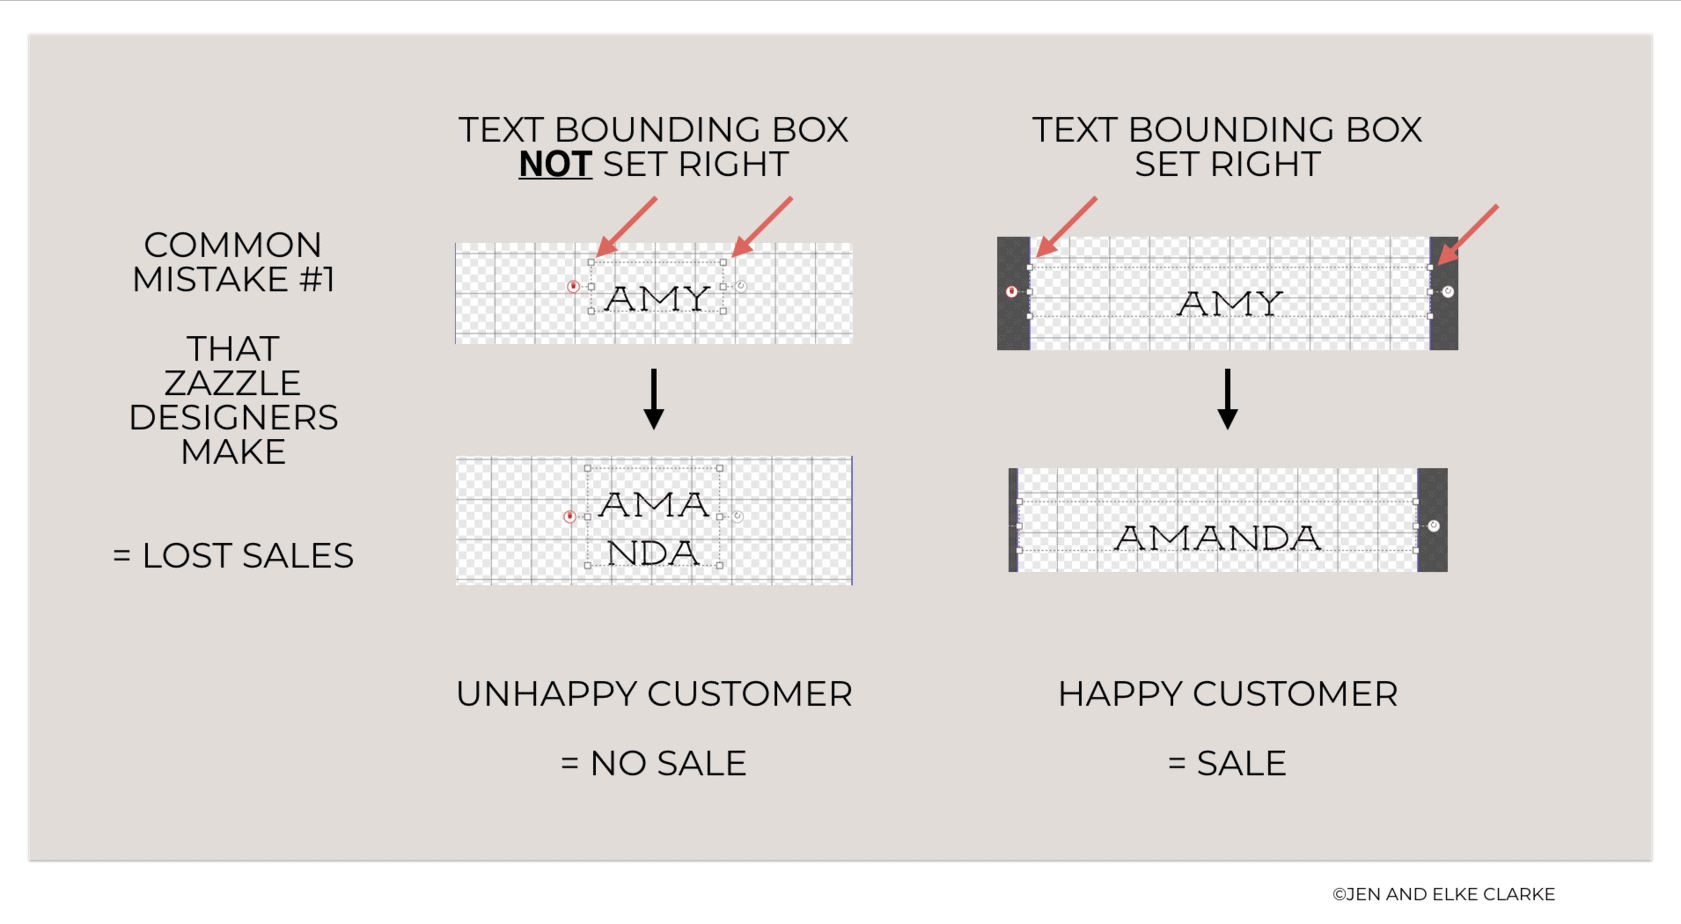
Every text field that you add to a design on Zazzle has a text bounding box. Set the box properly. When you add sample text that the customer can change, make sure the text box goes to the outer edges of where the text can go on the print area. That way when the customer wants to add their name, they will not have trouble adding the text on one line.
In this example below, when the text bounding box is set only for the letters “AMY” (3 letters), when the customer adds “AMANDA”, it will move to the next line. The customer will not be happy and will not buy.
No template field for customizable text = Common Design Mistake #2
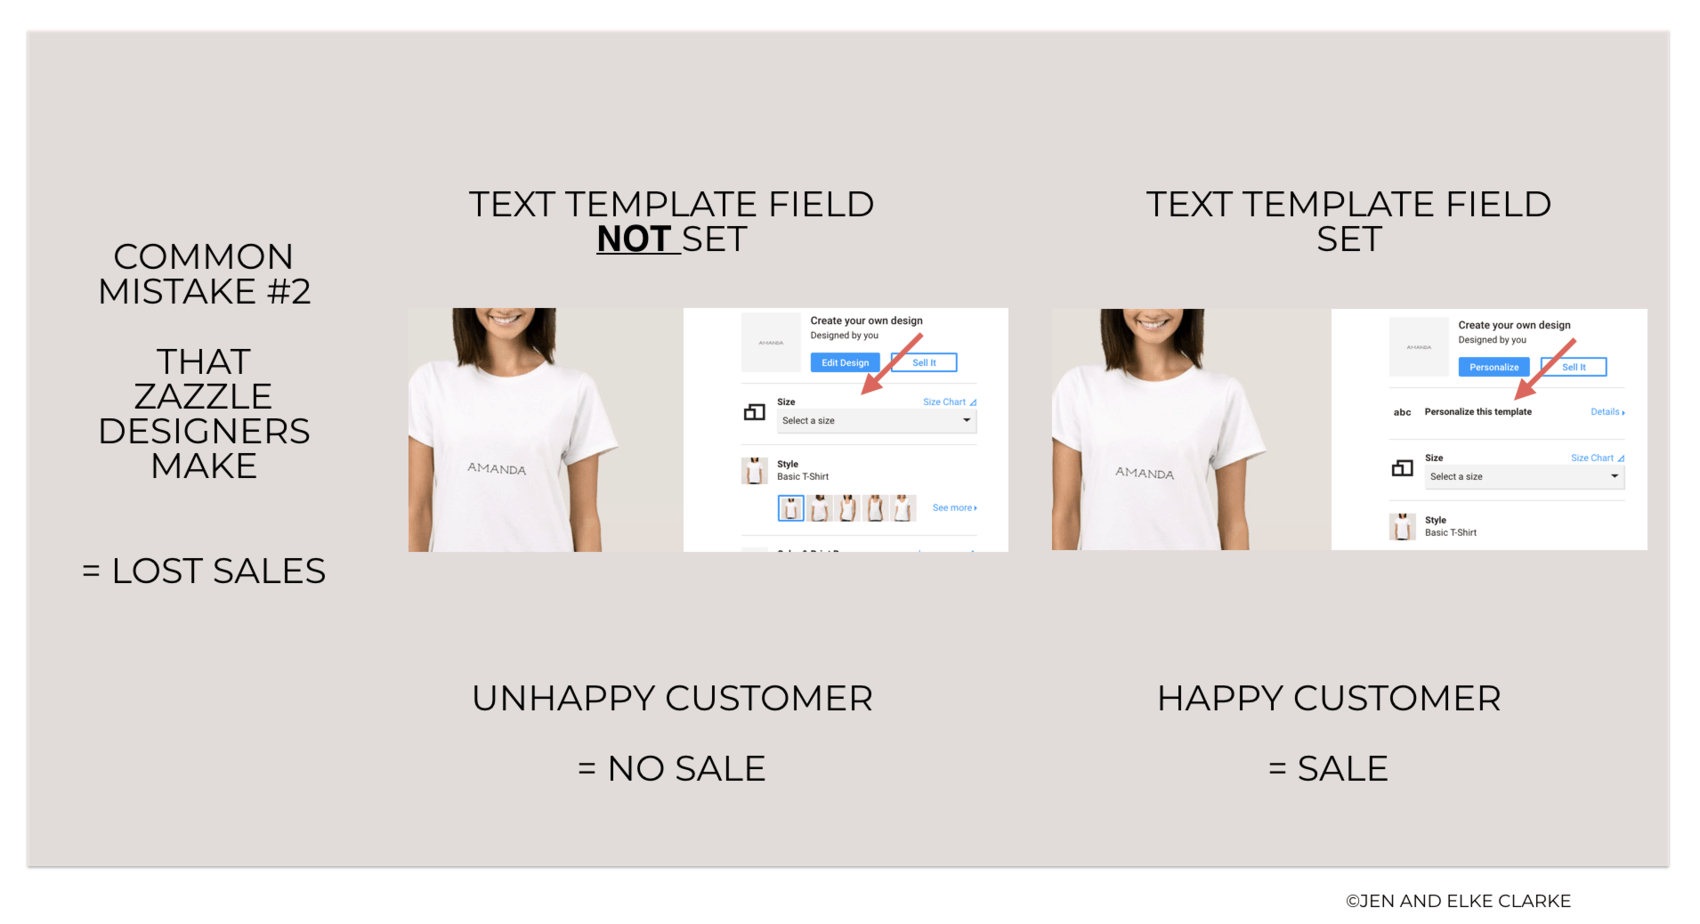
So you set the text bounding box fields correctly. Awesome! But then you forget to make this text layer a template field. Why is this a big deal? If the customer wants a shirt that says “Susan” instead of “Amanda”, then there is a problem. Most customers don’t know how to use the design tool. They won’t bother figuring out how to change the name unless you make it easy for them. Frustration sets in! The customer finds another product that CAN customize. You lose the sale.
Instead, make the text field for the text (name in this example below) a template fielding the Zazzle Design Tool BEFORE you post your product for sale. Then you will see the option ” Personalize this template” as an option (see the arrow). The customer can click on this and then replace the name with the one they want. Score!! Sale made. Happy customer.
Use of low-quality, incorrectly sized image file = Common Design Mistake #3
If you are using your own photography or a photo of your artwork, you must have a big enough file size AND the highest quality. If you don’t the print quality will be poor (the customer might return it) and the design is not desirable (the customer won’t even buy it).
Your photos and your art may be amazing, but if they don’t print well on the product (because you have a low-quality image file) it will not end in a happy customer sale if they even purchase.
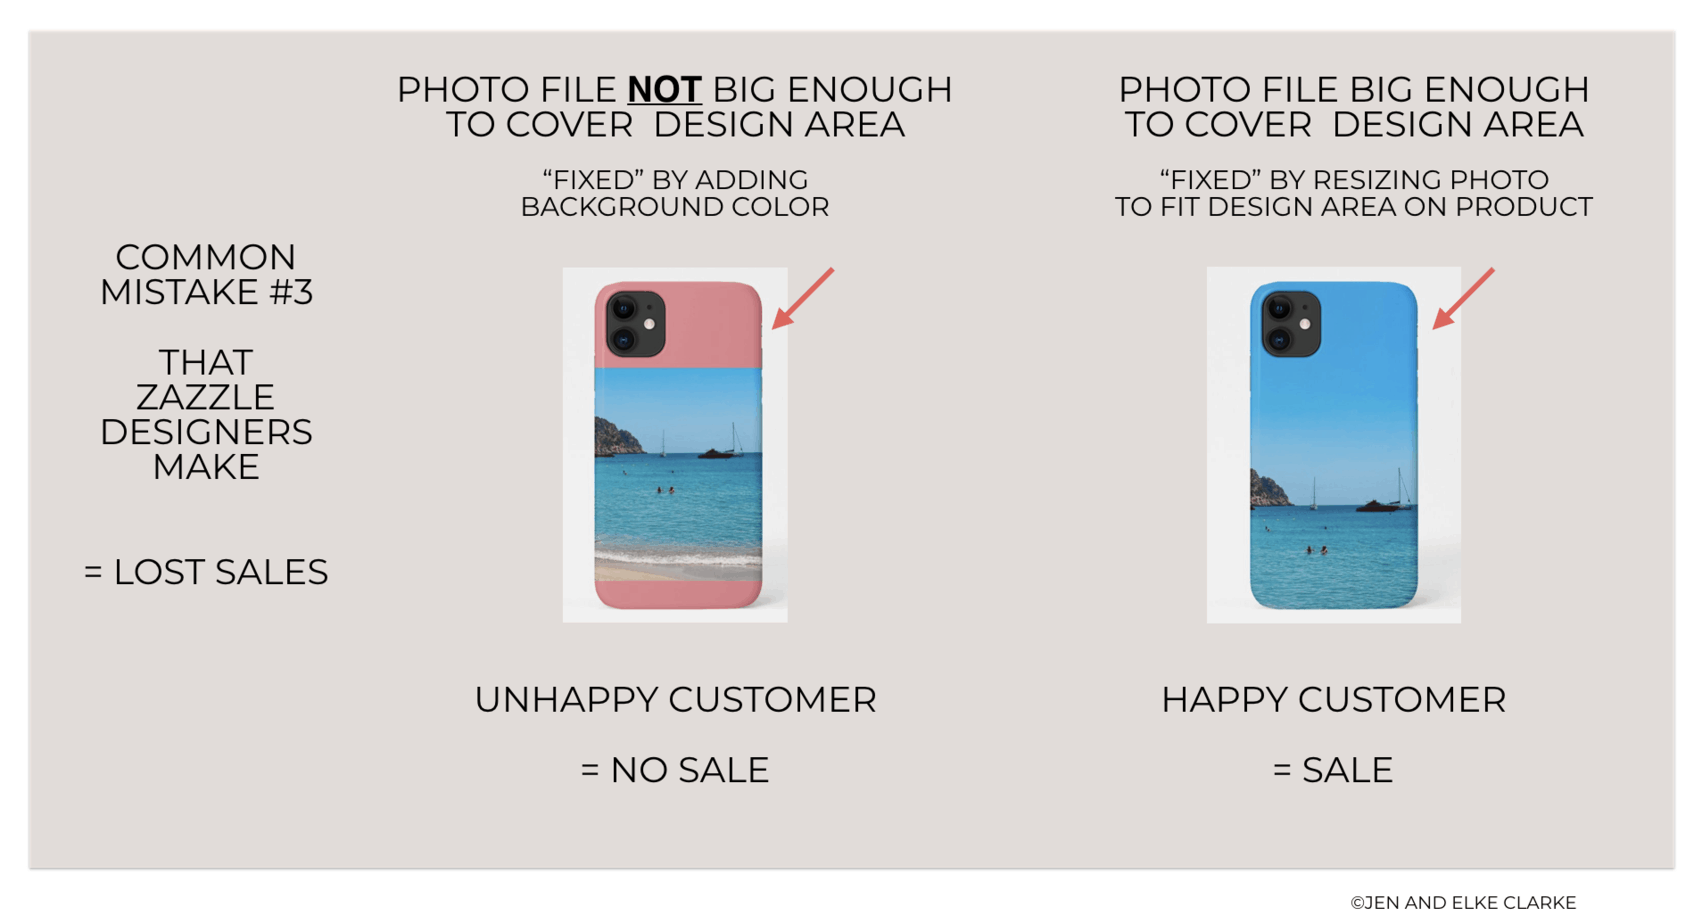
In the example below, the image file is too low (72 dpi) and not big enough in the file size to be enlarged to the area of the cell phone case. What many designers do to compensate is to add the file and make it as big as they can without getting the yellow warning message from Zazzle Then they will add a colored background to cover the rest of the print area.
The cell phone case on the left in the image below looks OK. But does it look good enough for customers to pay $30? Maybe not. At least not as many who would buy the one on the right. Why? Because the one on the left uses the correct file size and resolution (300 dpi). Now the image can be added over the entire design area of the phone case and the printing quality will be awesome. Cha-Ching!
Wrap up – How to Get More Sales on Zazzle – Avoid These 3 Mistakes
In this article we covered 3 common mistakes Zazzle Designers make:
- Incorrect bounding boxes for sample text
- No template field for customizable text
- Use of low-quality, incorrectly sized image file
The reason these mistakes are not always that obvious is that it’s hard to realize that you made them.
Jen and I make these mistakes even now after 13 years of posting products on Zazzle.
The reason we know these mistakes are important to avoid is that we have found out the hard way, through trial and error.
But once we fix these mistakes we make more sales on Zazzle.
Now it is your turn!
Join This Week’s Challenge – The Start and Scale Your Zazzle Online Business Challenge
If you found this article helpful you will love the free challenge we are doing this week May 26th to 29, 2020 at 3 p.m. EST.
It’s free to sign up, fun and you will get a ton accomplished.
Click here to sign up. If you missed a day you will be able to watch the replay.
